Getting Started with React, TypeScript and Redux.


This blog post will walk us through setting up a React, TypeScript and Redux application in few minutes. I'd assume you are familiar with the React ecosystem and probably have worked with TypeScript before but if you haven't, I'll briefly talk about the trio.
So, let's get started.
React.
React is an open-source, front end, JavaScript library for building user interfaces or UI components. It is maintained by Facebook and a community of individual developers and companies. React can be used as a base in the development of single-page or mobile applications. You can read more here.
TypeScript.
TypeScript is an open-source language which builds on JavaScript, one of the world’s most used tools, by adding static type definitions. You can read more here.
Redux.
Redux is an open-source JavaScript library for managing application state. It is most commonly used with libraries such as React or Angular for building user interfaces. Similar to Facebook's Flux architecture and it was created by Dan Abramov and Andrew Clark. You can get to know more here.
PROJECT SETUP
To create a React + Typescript Project, run the one the commands below (as stated in the Create React App official documentation).
npx create-react-app todo-app --template typescript

# or

yarn create react-app todo-app --template typescript
Running one of the commands will create a React app with the name "todo-app". We also specified the template by adding "--template typescript".
Cool? yeah yeah.
Open and Run the app
If you're using VS Code, you can simply run
cd todo-app && code . && npm start
That would navigate to your code directory, open it with VS Code and then start the development server at localhost:3000.
Open the code editor and your folder structure should look like this:
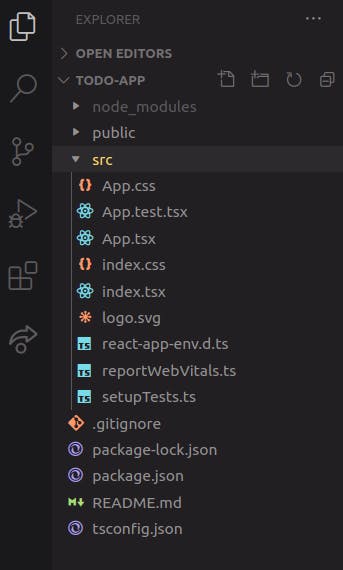
First thing you'd realise is that the extension for jsx files are replaced with .tsx and that of .js with .ts. CRA has taken care of installing all we need as base requirement in term of TypeScript.
CLEAN UP
We need to clean up App.tsx and App.css and replace the default content with our boilerplate code. I won't be creating any extra components so as not to divert us from the main concept this is all about.
Replace the content of App.tsx with this
import React from 'react';
import './App.css';

function App() {
  return (
    <div className="container">
      <header>
        <h5>React, Redux and TS Todo App</h5>
        <input type="text" name="todo-item"/>
        <button>Add Todo</button>
      </header>
      <main>
        <ul>
          <li>
            <span>Go home at 12</span>
            <button>Mark Complete</button>
          </li>
        </ul>
      </main>
    </div>
  );
}

export default App;
We have div with the className of "container", an header element which contains an h5 element, input element and a button to add an item to todo list. Also, in the main element, we have an unordered list which would be used to display our todo items.
Also, let's replace the contents of App.css with the below snippet:
.container {
  display: flex;
  flex-direction: column;
  align-items: center;
  width: 40vw;
  margin: 40px auto;
}
.container header {
  padding: 30px 100px;
  background: rgba(6, 145, 163, 0.45);
}
.container header {
  font-size: 30px;
  width: 100%;
  font-weight: 300;
  text-align: center;
}
.container header h5 {
  color: aliceblue;
  margin: 20px 0;
}
.container header button {
  border: none;
  padding: 10px 20px;
  font-size: 17px;
  cursor: pointer;
  outline: none;
  background: blueviolet;
  color: #ffffff;
}
.container input {
  width: 70%;
  font-size: 17px;
  padding: 10px;
}

/* MAIN */
main {
  width: 100%;
}
main ul {
  list-style: none;
  padding: 0;
  margin: 40px auto;
  min-width: 90%;
}
main ul li {
  margin: 20px 0;
  width: 100%;
  display: flex;
  justify-content: space-between;
  align-items: center;
  background: lightblue;
  padding: 10px;
  margin: 10px 0;
}

main ul li button {
  border: none;
  padding: 8px 20px;
  font-size: 15px;
  cursor: pointer;
  outline: none;
}
Start the development server, and your app should look like this.
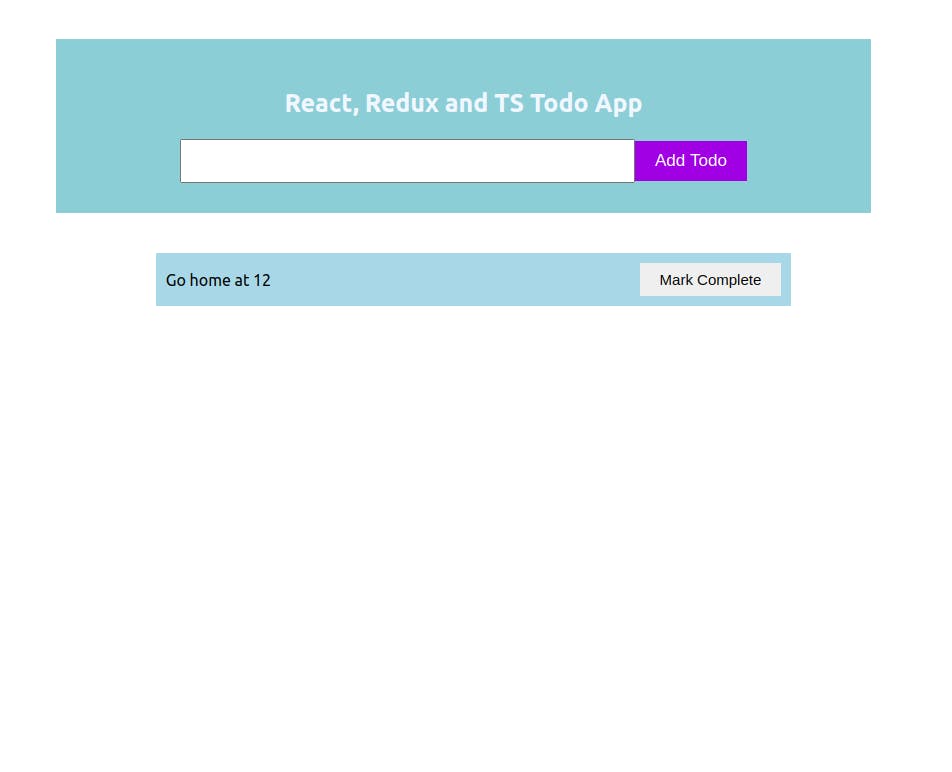
Kinda ugly? hahaha....
So, we've just completed the first phase. Let's keep moving...
INSTALLING NECESSARY DEPENDENCIES
Next thing to do is to add Redux to our app. As stated in the official docs, we'd need to install Redux toolkit and the react-redux package to connect Redux with React.
npm install @reduxjs/toolkit react-redux @types/react-redux
We also need to install the @types for react-redux that we installed since we're using TypeScript, in the format "@/types/package-name". Once the installation is done, you should see something like this.
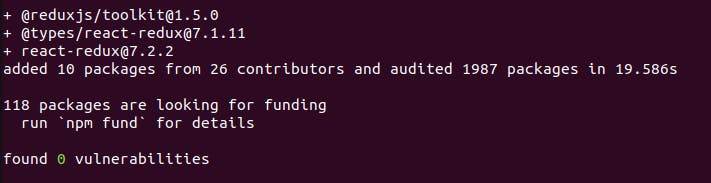
Great, we've completed the second phase; INSTALLING DEPENDENCIES.
REDUX CONCEPTS
ACTION >>> REDUCER >>> STORE >>> VIEW
Actions: These are performed by the user and it's to be declared as strings so as to specify a kind of action that could be performed by a User.
Action Creators: These are functions that create actions as pure objects specifying the type and payload which would be used in triggering a call to update the store.
Reducers: Reducers are pure functions that take in the current relative state, check the action's type and then update the state in an immutable way.
Store: is the general storage of our data. All data is being stored in the redux store.
CREATE REDUX FILES
So, let's create the necessary files for redux inside a folder I'd like to call redux in the src directory. After that;
1. Create action.ts file and add the following code snippet.
export const ADD_ITEM:string = "ADD_ITEM";

export const REMOVE_ITEM:string = "REMOVE_ITEM";
action.js contain variables with strings values of the actions we're expected the user to perform. This is to enable consistency as actions would be used in several files.
2. Create an action-creator.ts file and add the following:
import { ADD_ITEM, REMOVE_ITEM} from './actions';

export const ADD_ITEM_TO_TODO = (id: string, text: string) => ({type:ADD_ITEM, payload: {id, text} });

export const REMOVE_ITEM_TO_TODO = (id: string) => ({type: REMOVE_ITEM, payload: id});
Action creators make use of the declared actions (from actions.ts) to create objects to be used to dispatch an action through the reducer. Action creators are used in the components that need to dispatch an action.
3. Create a reducer.js file and add the following:
import { REMOVE_ITEM, ADD_ITEM } from './actions';

//TypeScript Props for action arg
interface ActionProps {
    type: string,
    payload: any
}

//TypeScript Props for action item
interface ItemProps {
    id: string,
    text: string
}
// Declare the intial state and assign the type of array to it
const initialState: [] = [];

// Declare and export the todoReducer which takes in the initial state and the action
export const todoReducer = (state = initialState, action: ActionProps) => {
    const clonedState = [...state];
    switch(action.type){
        case ADD_ITEM:
            return [...clonedState, {id: action.payload.id, text: action.payload.text}]
        case REMOVE_ITEM:
            return clonedState.filter((item:ItemProps) => item.id !== action.payload);
        default:
            return state;
    }
}
In summary, the above code snippet imports the actions we already created and then we create a reducer called todoReducer which is a pure function that takes in two parameters; state and action. We then check with the type of the action as specified in action-creators.ts to update the state.
4. Add store.ts file.
Inside store.ts is where we're going to create the redux store, add the reducer to it and then export it for use in index.tsx just as we'd have done with useContext.
Create a new file store.ts and add the following code snippet:
import {configureStore, combineReducers} from "@reduxjs/toolkit";
import {todoReducer} from './reducers';

const rootReducer = combineReducers({
    todo: todoReducer
})
export const store = configureStore({
    reducer: rootReducer
});


export type RootState = ReturnType<typeof store.getState>
ConfigureStore
This is a method from redux toolkit to create a store in redux especially when you're using TypeScript.
combineReducer and rootReducer
combineReducer is used to combine multiple reducers together and then assigned to a single variable, in this case called rootReducer. This'd be very helpful when you have multiple reducers handling different functionalities or actions. So, it's important to know how to combine reducers and then pass it as an item to the store using the configureStore method.
store
The variable store is configured with configureStore method from redux toolkit and the rootReducer is passed in as value to reducer object key. The store is then exported and would be used in the index.ts.
RootState
This is a type declaration for our global store and would be used wherever we want to get the updated state.
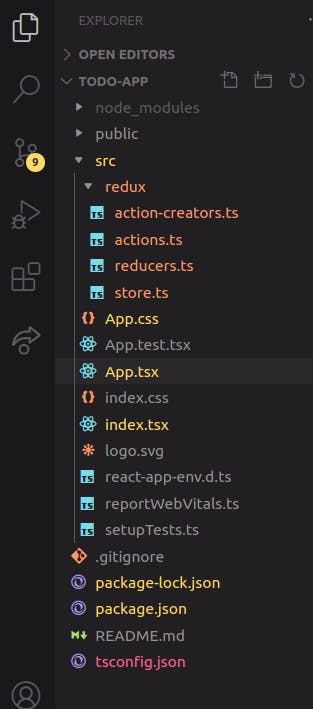
After adding all the four files, your folder structure should look like this:
5. Making the store available in our Components.
To make the store accessible to our react app, we need to wrap the root Component i.e with Provider from react-redux inside index.ts. We do this by importing Provider from react-redux and also import store from './path-to-store/store.ts'.
Replace the content of index.ts with this:
import './index.css';
import App from './App';
import reportWebVitals from './reportWebVitals';

import {Provider} from 'react-redux';
import {store} from './redux/store'

ReactDOM.render(
  <Provider store={store}>
    <React.StrictMode>
         <App />
     </React.StrictMode>
  </Provider>,
  document.getElementById('root')
);

reportWebVitals();
You'll notice how we wrap the App Component with the Provider and the store being passed as a prop.
So, we're done connecting our react app with redux. Next thing I'd be discussing is how to access the state and how to dispatch an action from any component.
6. Dispatching an action and Accessing the data in the store.
The goal is to allow users to add a todo item and be able to see the list of the todo items added. To do this, we need to go back to App.tsx file and then do the following:
Install uuid so as to generate random id(s) for our todo items and its TypeScript type package. To do so, run this in the terminal:
npm install uuid @types/uuid
then Import the following into App.tsx:
useState from React: This is to hold the value from the input element before being submitted. - Controlled input.
The action creator from action-creator.ts
useSelector and useDispatch from 'react-redux'.
RootState (Typescript Type) from store.ts;
After importing all these, the upper part of App.tsx should look like this:
import React, {useState} from 'react';
import { v4 as uuidv4 } from 'uuid';

import {ADD_ITEM_TO_TODO, REMOVE_ITEM_TO_TODO} from './redux/actionCreators';
import { useSelector, useDispatch } from 'react-redux';
import {RootState} from './redux/store';

import './App.css';
Good work so far. The next thing to do is to :
- declare a local state to hold the value of the input element
- get the todo state from store using useSelector
- declare a dispatch method from useDispatch method
- add event Handlers for onChange on input and onClick for the button.
Inside your App function before the render method, add this code snippet:
  const [item, setItem] = useState("");
  const todo: [] = useSelector((state: RootState) => state.todo);
  const dispatch = useDispatch();

  const handleSubmit = () => {
    //Check if the value of item is truthy before dispatching an action
    if (item) {
      const id:string = uuidv4();

      dispatch(ADD_ITEM_TO_TODO(id, item));
      setItem("");
    }
  };

  const handleRemove = (id:string) => {
    dispatch(REMOVE_ITEM_TO_TODO(id));
  }
Also, we need to attach the event Handlers to the input element and the buttons. So, our App.tsx should finally look like this:
import React, {useState} from 'react';
import { v4 as uuidv4 } from 'uuid';

import {ADD_ITEM_TO_TODO, REMOVE_ITEM_TO_TODO} from './redux/actionCreators';
import { useSelector, useDispatch } from 'react-redux';
import {RootState} from './redux/store'

import './App.css';

function App() {
  const [item, setItem] = useState("");
  const todo: [] = useSelector((state: RootState) => state.todo);
  const dispatch = useDispatch();

  const handleSubmit = () => {
    const id:string = uuidv4()
    dispatch(ADD_ITEM_TO_TODO(id, item));
    setItem("");
  };

  const handleRemove = (id:string) => {
    dispatch(REMOVE_ITEM_TO_TODO(id));
  }
  return (
    <div className="container">
      <header>
        <h5>React, Redux and TS Todo App</h5>
        <input type="text" name="todo-item" value={item} onChange={(e) => setItem(e.target.value)}/>
        <button onClick={() => handleSubmit()}>Add Todo</button>
      </header>
      <main>
        <ul>
          {todo?.map((item: {id: string, text: string}) => {
            return (
              <li key={item.id}>
                  <span>{item.text}</span>
                  <button onClick={() => handleRemove(item.id)}>Mark Complete</button>
              </li>
            )
          })}
        </ul>
      </main>
    </div>
  );
}

export default App;
If you go to your browser, everything should work perfectly. It's been a long ride and I hope this helps you in getting started with React, Redux, and TypeScript.
You can find the source code on github here.
To add as side note, you're not expected to use Redux for an app as simple as this. It's advised that redux be used for complex applications.
That's it. Thanks for reading.
If you have suggestions on how best to improve this, kindly drop them in the comment section below.